Last updated: June 17, 2026
Quick Answer
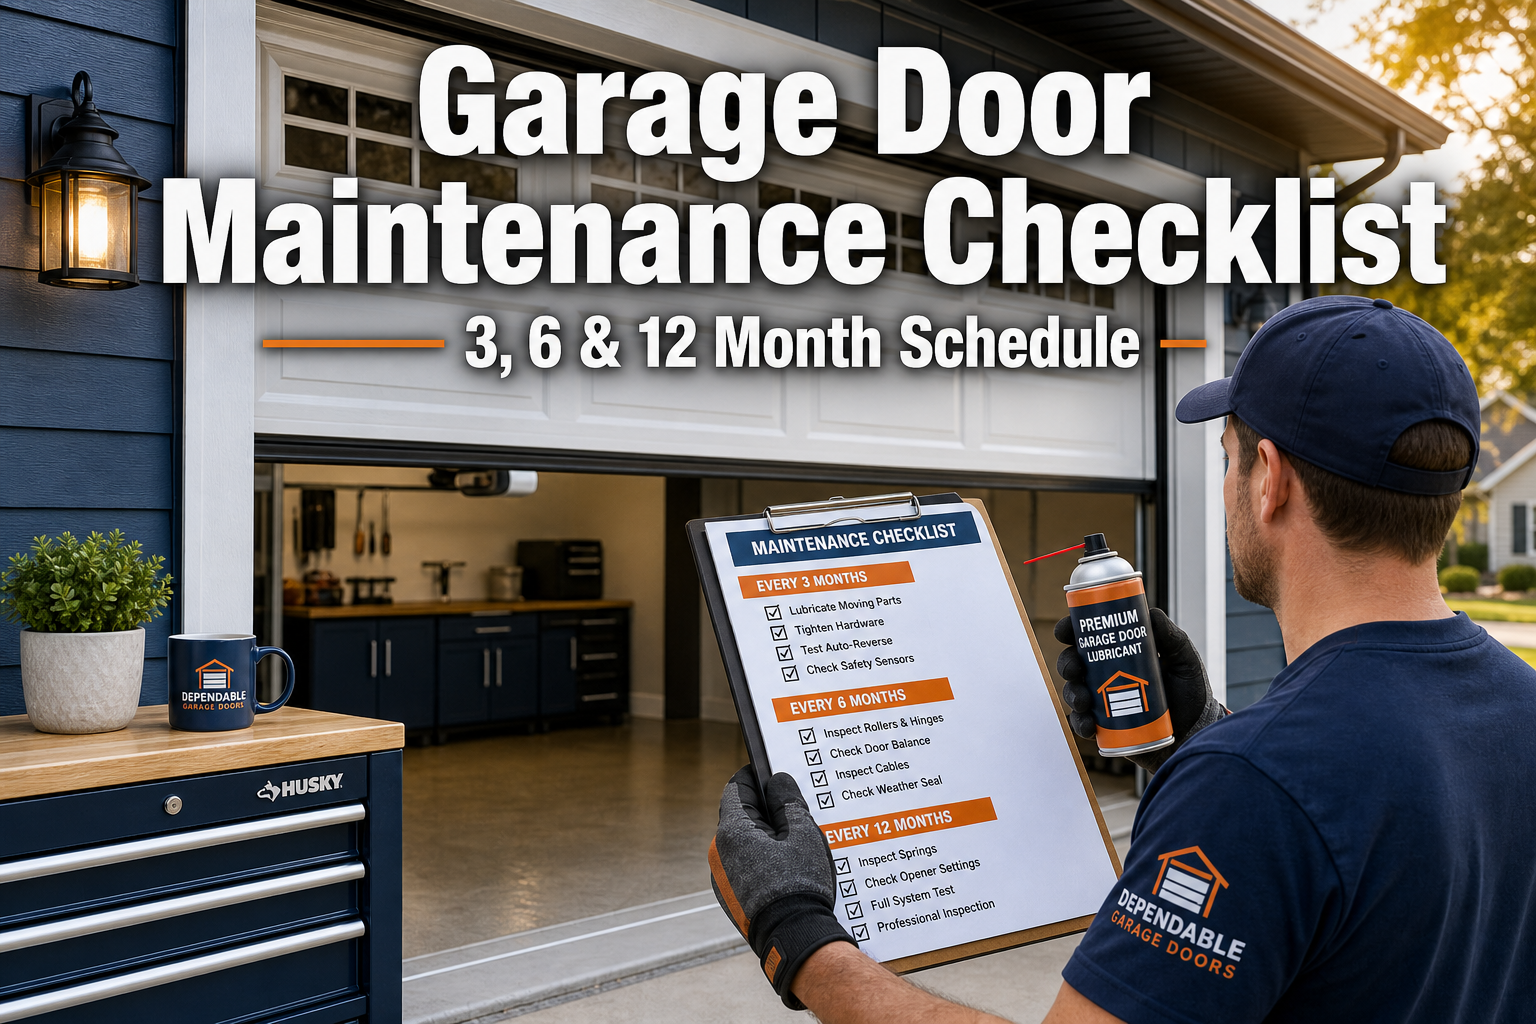
A complete garage door maintenance checklist covers tasks at three intervals: every 3 months (lubrication and visual checks), every 6 months (hardware tightening, balance tests, and safety feature verification), and every 12 months (professional inspection, weatherstripping replacement, and full system review). Following this schedule prevents most common failures, extends the life of springs and openers, and keeps the door safe for daily use.
Key Takeaways
- The National Association of Home Builders (NAHB) recommends lubricating garage door moving parts every 3 months to prevent premature wear and noisy operation.
- A properly structured garage door maintenance checklist divides tasks into quarterly, semi-annual, and annual intervals based on wear rate and complexity.
- Torsion and extension springs are under extreme tension and should never be adjusted or replaced by homeowners; professional service is required.
- Silicone-based or white lithium grease lubricants work best for most climates; avoid WD-40 on rollers, hinges, and springs.
- A professional annual inspection typically costs between $75 and $200 CAD in the Ontario region, depending on the scope of service.
- Poor or skipped maintenance can void manufacturer warranties on both doors and openers.
- Smart opener owners should add firmware updates and app connectivity checks to their 6- and 12-month maintenance tasks.
- Most homeowners can safely handle quarterly lubrication and visual checks; anything involving springs, cables, or opener adjustments warrants a technician.
- Wood garage doors require additional seasonal attention for sealing and painting compared to steel or aluminum doors.
- A door that reverses unexpectedly, moves unevenly, or makes grinding noises needs professional attention before the next scheduled interval.
What Are the Basic Steps to Maintain a Garage Door
Garage door maintenance comes down to six core actions: inspect, lubricate, tighten, test, clean, and adjust. These steps apply at every interval, but the depth and scope change depending on whether it is a 3-month, 6-month, or 12-month service.
Here is a summary of the full garage door maintenance checklist organized by interval:
| Task | Every 3 Months | Every 6 Months | Every 12 Months |
|---|---|---|---|
| Visual inspection of panels, tracks, hardware | Yes | Yes | Yes |
| Lubricate rollers, hinges, springs, chain | Yes | Yes | Yes |
| Test auto-reverse safety feature | Yes | Yes | Yes |
| Tighten all nuts, bolts, and brackets | No | Yes | Yes |
| Check door balance | No | Yes | Yes |
| Inspect and replace weatherstripping | No | No | Yes |
| Test photo-eye sensors | Yes | Yes | Yes |
| Inspect cables for fraying | No | Yes | Yes |
| Professional full-system inspection | No | No | Yes |
| Clean door surface and tracks | No | Yes | Yes |
| Firmware/app update for smart openers | No | Yes | Yes |
Common mistake: Many homeowners treat maintenance as a single annual event. The reality is that lubrication alone, done only once a year, allows metal-on-metal contact to cause wear for nine months out of twelve.
How Often Should You Lubricate Garage Door Parts
Lubricate garage door moving parts every 3 months. The NAHB explicitly recommends this quarterly cadence, and it aligns with guidance from Opendoor and most major door manufacturers. High-use doors (more than 4 cycles per day) may benefit from lubrication every 6 to 8 weeks.
Parts to lubricate at each 3-month service:
- Rollers (apply lubricant to the bearing, not the track itself)
- Hinges (where the hinge pin meets the bracket)
- Torsion or extension springs (a light coat along the coils)
- Opener chain or screw drive (use the lubricant specified by the opener manufacturer)
- Lock mechanism and handle
What not to lubricate: Tracks should be cleaned, not lubricated. Lubricant in the track attracts dirt and causes binding. Wipe tracks clean with a damp cloth instead.
For detailed guidance on choosing the right product for Ontario’s climate, see this comparison of the best garage door lubricant for Ontario’s climate: silicone vs lithium.
Best Lubricants for Garage Door Tracks and Rollers
Silicone-based spray and white lithium grease are the two best options for garage door lubrication. Each has a specific use case, and choosing the wrong one reduces effectiveness.
Silicone spray is best for:
- Nylon rollers (white lithium can degrade nylon over time)
- Weatherstripping (keeps it pliable without attracting dirt)
- Lock mechanisms
White lithium grease is best for:
- Metal rollers and hinges
- Torsion springs
- Opener chain or screw drives
Avoid: WD-40 is a solvent and degreaser, not a long-term lubricant. It will displace existing grease and leave parts dry within days. Avoid petroleum-based oils, which attract grit and gum up in cold weather, a particular concern in Ontario winters.
Your Complete Garage Door Maintenance Checklist: What to Do Every 3, 6, and 12 Months
This section breaks down every task by interval so the schedule is easy to follow.
Every 3 Months (Quarterly)
These tasks take roughly 15 to 20 minutes and require no special tools beyond a lubricant spray.
- Visual inspection: Walk around the door and look for dents, cracks, rust spots, or bent tracks. Check that all panels align evenly.
- Lubricate moving parts: Apply lubricant to rollers, hinges, springs, and the opener drive as described above.
- Test the auto-reverse: Place a 2×4 flat on the ground in the door’s path and close the door. It should reverse within 2 seconds of contact. If it does not, stop using the door and call a technician.
- Test the photo-eye sensors: Wave a broom handle through the sensor beam while the door is closing. The door should immediately reverse. Clean the sensor lenses with a soft cloth if the test fails.
- Listen and observe: Run the door through two full open-close cycles. Note any new grinding, squeaking, or jerking movement.
Every 6 Months (Semi-Annual)
These tasks take 30 to 45 minutes and require basic hand tools.
- Tighten all hardware: Use a socket wrench to snug up every bolt, nut, and bracket on the track, hinges, and roller brackets. Vibration loosens fasteners over time.
- Check door balance: Disconnect the opener by pulling the red emergency release cord. Manually lift the door to waist height and let go. A balanced door stays in place. A door that falls or shoots upward has a spring tension problem that needs professional attention.
- Inspect cables: Look for fraying, kinking, or rust on the lift cables near the bottom brackets. Do not touch or adjust cables; if they look damaged, call a technician. For more on cable issues, see this guide to garage door cable replacement: cost, signs, and safety risks.
- Clean tracks: Wipe the inside of both vertical and horizontal tracks with a damp rag to remove dirt, debris, and old lubricant.
- Check weatherstripping: Inspect the bottom seal and side seals for cracks, gaps, or compression loss. Replace sections that no longer form a tight seal.
- Update smart opener firmware: If the door has a connected opener, check the manufacturer’s app for firmware updates and verify that all automations and schedules are working correctly.
Every 12 Months (Annual)
The annual service is the most thorough interval and should include a professional inspection for most homeowners.
- Full hardware audit: Inspect every component including the header bracket, flag brackets, and horizontal track supports.
- Weatherstripping replacement: Replace the full bottom seal if it is more than 3 years old or shows any cracking.
- Professional spring and cable inspection: A trained technician can assess remaining spring life and cable integrity without the risk of injury. For context on what a professional visit covers, see this breakdown of a garage door tune-up: what’s actually done and what it costs.
- Opener full test: Test the force settings, travel limits, and all safety features. Replace the opener battery backup if applicable.
- Panel and finish inspection: Check for rust, rot (on wood doors), or impact damage that could worsen over winter.
- Review warranty documentation: Confirm that all maintenance tasks required by the manufacturer have been completed and documented.
Common Garage Door Problems You Can Prevent With Regular Maintenance
Regular maintenance prevents the majority of non-accidental garage door failures. The most common preventable problems are:
- Worn rollers: Nylon rollers typically last 10,000 to 15,000 cycles. Regular inspection catches wear before it causes track damage.
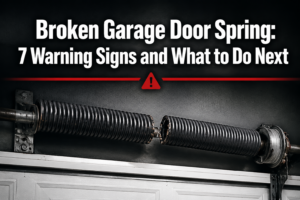
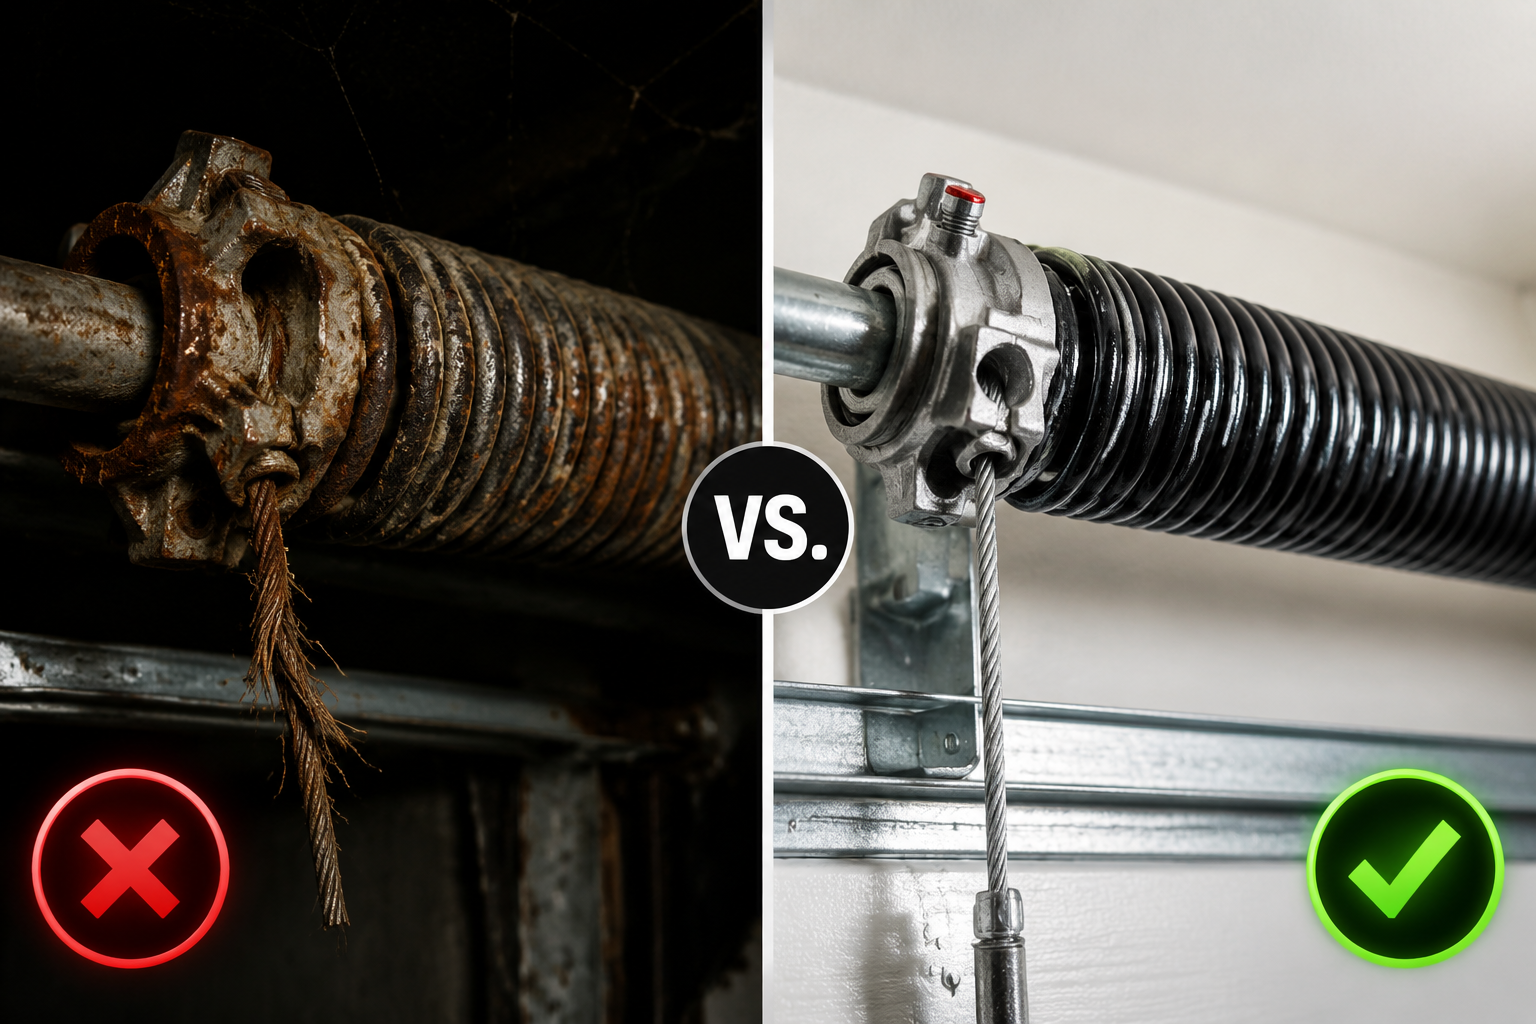
- Spring failure: Springs have a rated cycle life (typically 10,000 cycles for standard springs, 25,000 or more for high-cycle springs). Lubrication and regular inspection extend life and provide early warning. Learn the 7 warning signs of a broken garage door spring before one fails unexpectedly.
- Opener motor burnout: A door that is out of balance forces the opener motor to work harder. Catching a balance problem at the 6-month check prevents motor failure.
- Sensor misalignment: Dirty or shifted photo-eye sensors cause the door to reverse unexpectedly. Quarterly cleaning and testing prevents this. If reversal issues persist, this guide on why your garage door reverses before closing covers the most common causes.
- Water intrusion: Failed weatherstripping allows water to enter the garage, damaging floors, stored items, and the door’s bottom section.
- Rust and corrosion: Annual cleaning and touch-up painting on steel doors prevents surface rust from penetrating to structural components.
How Do You Know If Garage Door Springs Need Replacement
A spring likely needs replacement when the door is visibly uneven when opening, falls quickly when manually released at waist height, or has a visible gap in the coil of a torsion spring. These are the clearest signs of spring failure or near-failure.
Other indicators include:
- The opener strains or stalls when lifting the door
- The door opens only 6 inches and stops (a safety feature triggered by spring failure)
- A loud bang from the garage, which often signals a spring breaking
- Visible rust, corrosion, or stretched coils on the spring
Critical safety note: Torsion springs are under hundreds of pounds of torque. Never attempt to replace or adjust them without professional training and the correct winding bars. For current replacement cost estimates in the Oakville area, see how much garage door spring replacement costs in Oakville in 2026.
Is Garage Door Maintenance Something a Homeowner Can Do Themselves
Most quarterly and semi-annual maintenance tasks are safe for homeowners to perform. The exceptions are anything involving springs, cables, and opener force adjustments, which require professional tools and training.
Safe for DIY:
- Lubrication
- Visual inspections
- Safety sensor testing
- Hardware tightening
- Track cleaning
- Weatherstripping replacement
- Firmware updates on smart openers
Requires a professional:
- Spring tension adjustment or replacement
- Cable replacement or re-routing
- Opener force and travel limit calibration (if the door is not reversing correctly)
- Any repair following a collision or structural damage
The 6-month balance test is a good diagnostic tool for homeowners, but if the door fails the test, the correction itself must be done by a technician.
What Tools Do You Need for Basic Garage Door Maintenance
Basic DIY garage door maintenance requires only a handful of common tools. No specialized equipment is needed for the quarterly and semi-annual tasks.
Tool list:
- Socket wrench set (3/8″ drive covers most garage door hardware)
- Adjustable wrench
- Flathead and Phillips screwdrivers
- Stepladder (to reach the top brackets and opener)
- Clean rags or paper towels
- Silicone spray lubricant
- White lithium grease spray
- Mild household cleaner (for door surface)
- Measuring tape (to check track alignment if needed)
- Safety glasses and work gloves
Optional but useful:
- A level (to verify track plumb)
- A multimeter (to test opener battery voltage)
- Painter’s tape (to mark hardware positions before tightening)
What’s the Average Cost of Professional Garage Door Maintenance
A professional garage door maintenance visit in Ontario typically costs between $75 and $200 CAD, depending on the scope, the company, and whether parts are needed. Annual service contracts, which are increasingly common, often bundle two visits per year for $150 to $300 CAD.
Cost breakdown by service type:
| Service | Estimated Cost (CAD) |
|---|---|
| Basic tune-up (lubrication, visual check) | $75 – $120 |
| Full annual inspection with adjustments | $120 – $200 |
| Annual service contract (2 visits) | $150 – $300 |
| Spring replacement (per spring) | $150 – $350 |
| Opener repair | $100 – $300 |
| Cable replacement | $100 – $250 |
These are estimates based on typical Ontario market pricing as of 2026. Actual costs vary by company and door complexity. For a detailed breakdown of what a professional visit includes, see the full garage door tune-up guide.
How Much Does It Cost to Repair a Garage Door Opener
Garage door opener repairs in Ontario typically range from $100 to $300 CAD for most common issues, including circuit board replacement, gear and sprocket kits, and drive system repairs. A full opener replacement runs $350 to $700 CAD installed, depending on the model and drive type.
Common opener repair costs:
- Logic board replacement: $150 – $250
- Gear and sprocket kit: $100 – $180
- Drive belt or chain replacement: $100 – $200
- Safety sensor replacement: $75 – $150
If an opener is more than 10 to 15 years old and requires a major repair, replacement is often the more cost-effective choice. For professional opener repair service, see garage door opener repair in Oakville.
Signs Your Garage Door Needs Professional Inspection
Several warning signs indicate the door should not wait for the next scheduled maintenance interval. Call a technician promptly if any of these appear:
- The door reverses before fully closing or refuses to close at all
- Visible gap in a torsion spring coil (spring has broken)
- Frayed, kinked, or slack lift cables
- The door moves unevenly or one side is lower than the other
- Grinding or scraping sounds that are new or worsening
- The opener runs but the door does not move
- The door has been struck by a vehicle or fallen off its tracks
A door that is off its tracks or has a broken spring is a safety emergency. Do not attempt to operate it. For urgent situations, same-day emergency garage door repair in Oakville is available.
Differences Between Maintenance for Wood vs. Metal Garage Doors
Wood and metal garage doors share the same mechanical maintenance requirements but differ significantly in surface care. Metal doors (steel and aluminum) are lower maintenance overall; wood doors require active protection against moisture and UV exposure.
Wood garage door additional maintenance tasks:
- Inspect all painted or stained surfaces every 6 months for peeling, cracking, or discoloration
- Sand and repaint or re-stain any bare wood areas annually, or more often in wet climates
- Check all joints and seams for gaps where water can penetrate
- Apply a wood sealant to the bottom edge of the door annually to prevent moisture wicking
- In Ontario’s climate, inspect after freeze-thaw cycles, as wood expands and contracts more than metal
Steel door additional maintenance tasks:
- Inspect for rust spots or chips in the finish at the 6-month check
- Touch up any bare metal with rust-inhibiting primer and exterior paint
- In coastal or high-humidity areas, wash the door surface quarterly to remove salt and contaminants
Aluminum doors are the lowest-maintenance option for surface care, as they do not rust, but they dent more easily and should be inspected for structural deformation after any impact.
Can Poor Maintenance Void a Garage Door Warranty
Yes, neglecting required maintenance can void both the door manufacturer’s warranty and the opener warranty. Most warranties include a clause requiring the owner to follow the manufacturer’s maintenance schedule, which typically includes periodic lubrication, hardware checks, and professional inspection.
Specific scenarios that commonly void warranties:
- Using the wrong lubricant (such as WD-40 or petroleum oil) on springs or rollers
- Failing to address a balance problem, which causes premature opener motor failure
- Attempting DIY spring or cable repairs that damage adjacent components
- Skipping annual professional inspections when the warranty explicitly requires them
Best practice: Keep a simple log of every maintenance task performed, including the date, products used, and any observations. This documentation supports a warranty claim if a component fails prematurely.
Safety Tips for DIY Garage Door Maintenance
DIY maintenance is safe when it stays within the correct scope. The following precautions apply to every homeowner performing their own quarterly or semi-annual checks.
- Disconnect the opener before doing any hands-on work. Pull the red emergency release cord to put the door in manual mode.
- Never work on a door that is in the open position without securing it. Use locking pliers clamped to the track below the bottom roller to prevent the door from falling.
- Do not touch the torsion spring, winding cones, or cables. These are under extreme tension and can cause severe injury if released suddenly.
- Wear safety glasses when lubricating springs or working near the opener mechanism.
- Test the auto-reverse before every use after any maintenance. Even a small adjustment to sensor alignment can affect safety function.
- Work with a partner when testing door balance or performing any task that requires one person to hold the door while another observes.
- If in doubt, stop. A task that feels unsafe or requires tools not on the basic list should be handed to a professional.
Following the Garage Door Maintenance Checklist: What to Do Every 3, 6, and 12 Months When You Have a Smart Opener
Smart opener owners have one additional layer of maintenance beyond the mechanical tasks. App-connected openers require periodic digital health checks to stay secure and reliable.
Every 6 months:
- Check the opener manufacturer’s app for available firmware updates and install them
- Review which devices and users have access permissions; remove any that are no longer needed
- Test the Wi-Fi connection reliability by operating the door remotely from outside the home network
- Verify that all scheduled automations (auto-close timers, for example) are functioning correctly
Every 12 months:
- Confirm that the opener’s audiovisual alerts (lights and beeps before automated closing) are working, as required by UL safety standards for app-controlled doors
- Test the battery backup if the unit has one; replace the battery if it no longer holds a full charge
- Review the security settings and change the access PIN if the same code has been in use for more than a year
A 2026 analysis of smart opener support calls found that a significant share of reported “malfunctions” traced back to outdated firmware or misconfigured app settings rather than mechanical failures, making digital maintenance as important as physical upkeep for connected systems.
Conclusion
A structured garage door maintenance checklist is one of the most cost-effective home maintenance habits available to homeowners. The investment is modest: roughly 15 minutes every 3 months for lubrication and safety checks, 30 to 45 minutes twice a year for a deeper inspection, and one professional visit annually to cover what cannot safely be done without training.
Actionable next steps:
- Set a recurring calendar reminder for the first weekend of every third month to complete the quarterly lubrication and safety test routine.
- Schedule semi-annual checks for spring and fall, when temperature changes stress mechanical components most in Ontario’s climate.
- Book a professional annual inspection before winter if the door is more than 5 years old or sees more than 4 cycles per day.
- Start a simple maintenance log, even a notes app entry with the date and tasks completed, to protect your warranty and track wear patterns.
- If the door currently shows any of the warning signs described in this article, do not wait for the next scheduled interval. Contact a qualified technician promptly.
For homeowners in the Oakville and surrounding area who want professional support with any part of this schedule, the team at Oakview Garage Doors provides tune-ups, spring service, opener repair, and emergency response across the region.
Frequently Asked Questions
How long does a garage door maintenance session take for a homeowner? The quarterly lubrication and safety check takes 15 to 20 minutes. The semi-annual hardware tightening and balance check adds another 20 to 30 minutes. A professional annual inspection typically takes 45 minutes to 90 minutes depending on the door’s age and condition.
What happens if I never lubricate my garage door? Without lubrication, metal rollers, hinges, and springs experience accelerated wear from friction. This leads to noisy operation, premature roller failure, and eventually spring or opener failure. The NAHB cites lack of lubrication as one of the most common causes of premature opener failure.
Can I use WD-40 on my garage door springs? No. WD-40 is a solvent that removes existing lubrication. It leaves springs dry within days and can accelerate corrosion. Use white lithium grease or a dedicated garage door lubricant on springs.
How do I test the auto-reverse on my garage door? Place a flat 2×4 board on the ground in the center of the door’s path and close the door using the opener. The door should reverse within 2 seconds of touching the board. If it does not reverse, stop using the door and call a technician immediately.
How long do garage door springs typically last? Standard residential torsion springs are rated for approximately 10,000 cycles. At 4 cycles per day, that is roughly 7 years. High-cycle springs rated for 25,000 or more cycles are available and cost more upfront but reduce replacement frequency significantly.
Is it safe to replace garage door weatherstripping myself? Yes. Bottom seal and side seal replacement is a safe DIY task. The bottom seal slides into a retainer channel and can be replaced without tools in most cases. Side and top seals are typically stapled or nailed in place and require only basic hand tools.
How do I know if my garage door is out of balance? Disconnect the opener by pulling the emergency release cord, then manually lift the door to waist height and let go. A balanced door stays in place. If it falls or rises on its own, the spring tension is off and needs professional adjustment.
Does my garage door warranty require professional maintenance? Many warranties do. Review the warranty documentation for your specific door and opener model. Most require periodic lubrication and may require annual professional inspection to keep the warranty valid. Keep records of all maintenance performed.
What is the lifespan of a garage door with proper maintenance? A steel garage door with consistent maintenance can last 20 to 30 years or more. Wood doors typically last 15 to 25 years with proper sealing and painting. Openers generally last 10 to 15 years regardless of maintenance, though regular service extends the upper end of that range.
When should I replace rather than repair my garage door? Consider replacement when repair costs exceed 50% of the cost of a new door, when the door has sustained structural damage that affects balance or alignment, or when the door is more than 20 years old and requires repeated repairs. For guidance on new door options, see garage door installation in Oakville.
Can I do the 6-month balance test if I have a one-piece tilt-up door? The standard balance test applies to sectional doors. One-piece tilt-up doors have a different spring mechanism and should be assessed by a technician if balance or tension issues are suspected.
How often should I replace the bottom weatherstrip seal? Inspect the bottom seal at every 6-month check. Replace it when it shows cracking, tearing, or no longer compresses against the floor to form a seal. In most climates, this is every 2 to 4 years depending on UV exposure and temperature cycling.
References
- National Association of Home Builders (NAHB). Home Maintenance Recommendations. nahb.org.
- Home Depot. Garage Door Maintenance Tips. homedepot.com.
- The Garage Guide. Complete Annual Garage Door Maintenance Checklist. 2026.
- Thompson Garage Doors. Ultimate Garage Door Maintenance Checklist. 2026.
- Precision Door. Yearly Garage Door Maintenance Checklist. 2025.
- Cheney Door Co. Eight-Step Preventative Maintenance Checklist. 2026.
- Overhead Door. Yearly Maintenance Check List. overheaddoor.com.
- Opendoor. Home Maintenance Checklist. 2026.
- Farnsworth Group. Garage Door Market Trends and Service Productization. March 2026.
- A1 Garage Door. Garage Door Trends Homeowners Need to Know. 2026.